Use the wedding’s QR code or direct invitation link to open Capture in your browser. Join with a display name, open Camera, select photos or videos, and wait for confirmation. Guests do not need an account or app download; the host must have guest uploads enabled.
From invitation to uploaded photo
Open the wedding invitation
Scan the event QR code with your phone camera and tap the link, or open the direct invitation. Check the wedding name. If you are asked for a code, enter the six-character code supplied by the host.
Join with your name
Enter a display name and tap Join event. You do not need to enter an email or create a password. Use the language selector if needed.
Open Camera and choose how to share
Tap Camera in the bottom navigation. Take a photo in the browser, try Photo Booth, or choose existing photos or videos. For a batch, choose Upload multiple files and select up to 20. Allow camera access if you want to take a new photo.
Review, then tap Post
For a single photo, choose a filter or frame and optionally add a caption or folder. Tap Post and wait for confirmation that the file is saved locally. Keep the event open with a connection to let it upload.
Check the upload status
Saved locally means the file is queued on this device; it has not necessarily reached the gallery. Check the upload list for completion or Retry. A completed upload may be awaiting approval or saved for the scheduled reveal, so avoid posting another copy just because it is hidden.
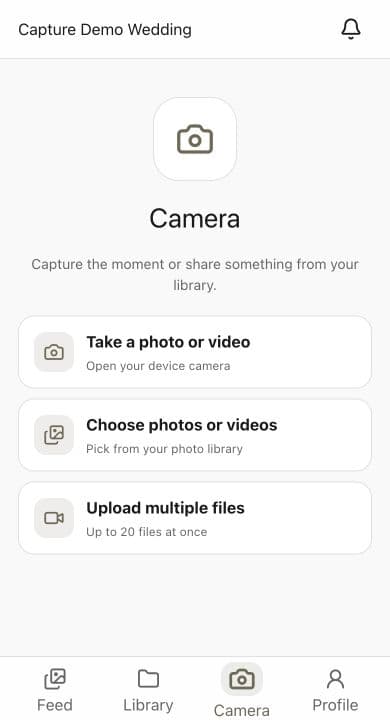
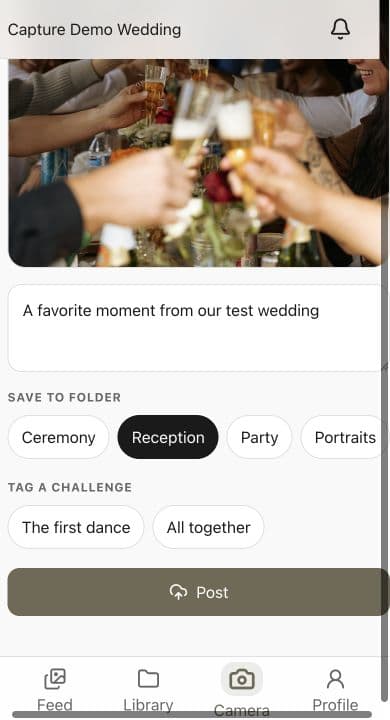
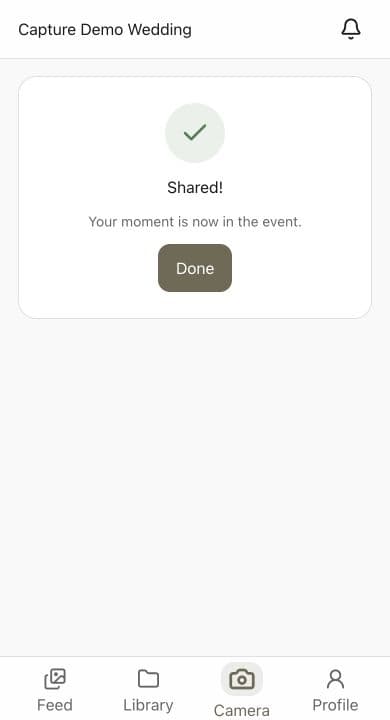
Sample wedding screenshots illustrate choosing a library photo and adding a caption. The current Camera screen also includes filters, Photo Booth, and an upload list. Follow the steps above for current status messages, and rehearse your printed QR code on the phones guests will use.
Preparing the wedding? Download table cards and welcome signs.
The Short Answer
The invitation opens the event in your browser. Take a photo with filters, try Photo Booth, or choose existing files. Pending uploads are saved locally and can resume after a reload when you reopen the same event and guest session. Retain your originals.
Before guests arrive
The host creates the event in the Capture iPhone app and shares its event-specific QR code or invitation link. Use that same destination on every table card and welcome sign. A QR code pointing only to the Capture homepage will not identify your wedding.
Check guest uploads, viewing, and approval settings. Rehearse the printed code and a sample upload with an iPhone and an Android phone on the venue connection. Keep a direct invitation link available if a camera has trouble reading the sign.
File limits and photo quality
The browser accepts up to 20 files in a batch. Each photo must be under 20 MB and each video under 100 MB. An image or video file still needs to be readable by the browser; if it is rejected, try a compatible JPEG photo or a shorter video copy.
Photos and videos are stored exactly as guests upload them, with no resizing or re-compression; a 2,048-pixel copy is used only for fast browsing. Downloads and the host’s ZIP export use the originals.
The QR code will not scan
Clean the camera lens, move the phone closer or farther away, and avoid reflections from glass or glossy paper. Preserve the blank border around the code. Ask the couple for the direct event link if scanning still fails.
If you reach the wrong wedding or an inactive event, stop and ask the host to confirm the invitation. Changing phones will not repair a printed code that points to the wrong destination.
The upload is stuck or a file failed
Open the upload list from Camera or the event header and check the file’s status. Queued files resume while the event is open with a connection and uploads are allowed. If a file is marked failed, use Retry on that entry; successful files do not need to be selected again.
After confirmation that files are saved locally, the queue survives a page reload in the same browser and guest identity. It does not continue uploading after the browser closes, and clearing browser data or browser storage cleanup can remove pending files. Switching browsers will not carry the queue over. Keep originals; an oversized or unsupported file needs a compatible smaller copy.
My photo uploaded but I cannot see it
Check the upload status first. Saved locally means the file is still on this device; awaiting approval means the host must review it; saved for the reveal means it stays hidden until the scheduled time. Approval still applies after reveal. Check the selected folder before posting another copy.
If the event has closed or uploads have been disabled, the host needs to review the settings. Do not assume that a missing upload is caused by subscription expiry.
Saving the collection after the wedding
Individual downloads are available when allowed by the host and deliver the original file. The host exports the complete collection from the iPhone app as a ZIP of original files (link emailed, opens on any computer) or straight into the Photos app.
The couple can send the same event link in a later reminder while uploads remain enabled. Ask guests to keep their camera originals, especially for photos you may want to print at a large size.
What This Means for You
- Scan the event-specific code and check the wedding name.
- Try one upload first and distinguish queued, uploaded, awaiting approval, and saved for reveal.
- Keep originals and test the final download before depending on the gallery as your only backup.
Sources
Keep the moments close
Every guest’s perspective.
One shared collection.
Create a private gallery, share a QR code, and bring your event’s photos together.
Start 7-day free trial Explore plans